Well here goes nothing. I bought a MTL F-7 trainset, a GP-35 trainset, also a Marklin 81466 Micado steam loco set.I also got 2 packs flex track (599),2 packs 110mm track.also add 990-40-101 and 990-40-102.This should get me started.I used to N scale but alas space and time constraints got in the way.I have a N scale turntable by atlas that i'm thinking of modifying to Z.I also think the # 2541 pier set can be modified for use as well.should prove interesting at any rate.
Member Blogs
Subcategories from this category:
My LayoutThis is Micro trains Line SD40-2 Santa Fe model which I customized with working ditch lights.
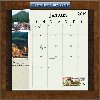
Free Z Central Station 2012 Monthly Calendar
Welcome to the 2012 Z Central Station's free PDF monthly calendar! This is a free download. Just click on the calendar image to start the download. Enjoy!
I am a bit timid about certain things, making changes to my layout among them. I note that my previous blog entry said I painted the layout was in July and now in November I can finally say I have taken the next step.
This past weekend, at GTE (Puyallup, WA), I brought my mountain layout, a bottle of Woodland Scenics turf powder, a bottle of white glue, and a spray bottle. On Saturday, just as I was starting an inconsequential corner of the layout, Jacob, the son of the folks running a neighboring layout came over, asking what I was doing, and could he help (I felt like Tom Sawyer whitewashing the fence). Once I showed him what I wanted to do, he was at it like a wild man. In under 45 minutes, my "chocolate" mountain was replete with turf. Jacob approached the task with a concentrated abandon. The result was that we had to spend about half the time it took to add turf to clean up powder from the table, the floor, and spots on the layout that didn't get the prepatory glue. The latter was actually an advantage, as it left some bare spots where the raw earth poked through the turf - just like the real thing.
Jacob going to town:

By the following day, the glue was dry enough that my Sounder commuter train was making a special Sunday run:

(Next task: asking Becky Thatcher to the dance!)
I have always wanted to start a blog, but 'starting' it is usually the first stumbling block. This is true with a 2' by 5' canvas behind me for a layout. I have projects and a test track on it, but nothing resembling any work of 'my' dream layout. I am really hoping mid January to start some layout planning. I do know I want to include a curved trestle bridge, a pickle plant, turntable, a couple of other types of bridges, and keep the scheme during the transition period. I have some Marklin steamers and MTL F7's that will work well together. But more on that project(s) later.
I do want to share different aspects of my modeling experience, along with maybe some ZCS website aspects. I think mixing things up will be interesting. Maybe some personal details too, so you can get to know who Soccrdad30 really is. I do not want to 'plan' blog entries, so do not expect scheduled entries.
So, with that in mind. I would like to share "My Favorite Z Project" Contest entry. My project is a gas! Okay, bad pun. I am "Kitbashing" an MTL 40' standard single door boxcar, and turning it into a Navy U.S.N.X. Helium Freight Car. What is interesting, is there were 3 container helium cars and 30 container helium cars produced. And these were in the gray paint scheme. I am working on the 30 container freight car.
In the below photo you can see the car so far. I used Plastruct channeled strip for the side supports, while cutting out the middle of the car but leaving the roofwalk. I have the containers glued together and painted in gray. I used 3/32” Plastruct tubing for the containers. And you can see some of the tools I used, including my cheap 10.00 chopper that I bought at a train show (bonus!). Slugger got me hooked on Plastruct Plastic Weld – Love it! And for Christmas 2010, I received a couple of Railway Prototype Cyclopedia’s. What is interesting is in this booklet has an article about brake wheels, but look at the Ajax April 1943 Brake Wheel ad showing a U.S.N.X. helium car. The side supports are configured differently from the research images and from commercial RTR cars. Oh well, I will stay with what I started.
Okay, here is a closer view of my contest entry. I just need to paint, create my decals, then apply the decals before inserting the containers. I know some thoughts are going on about the finer details. But, on my next one, I would like to get it more proto. This one I am happy to finish, and to be learning new modeling skills. My next photos will be of the finished helium car, and will be entered into the contest.


