Member Blogs
Roadbed Begins!
With my basic table completed, it was time to start laying out some roadbed in preparation for track. Since the table is 24” across, and I wanted my mainline curve radius to be as large as possible, the outer track would have a radius of 11.5”, giving me approximately a half inch at the edges. I suppose that’s not a lot of clearance given we have cats, but I wanted to use as much of the table top as possible.
But that’s not some standard size, and given it’s a dual mainline, I’d need an inner track curvature of 10.75” (using 0.75” separation between the tracks, which equates to 2” in HO scale, a pseudo-standard). Clearly pre-made track won't work, although I could use flex track.
But that’s not me. This layout isn’t so large that hand-laying track is so onerous, and I wanted to try it anyway. I’ve been building hand-laid turnouts in HO, so let’s see if I can translate that to Z. Too, I wanted some easement into the curve, so I can do just about anything when I lay the rail myself.
The question is then what roadbed to use? Cork seems most used in Z, and I’m happy to use it. Looking around I find a couple of vendors for pre-fabricated cork roadbed, but aside from the expense, the roadbed is pre-formed for vendor’s track. While that’s not so bad for straight, and possibly even curves, for turnouts it’s a bit problematic. Most of the formed cork I’ve seen includes area for the switch solenoid, and for hand-laid turnouts you don’t have movement above the table (I’m going to use micro-servo motors, another blog for a later date). Sure, I could trim the cork, but there is also thickness. All of the cork I looked at seemed too thick to me.
So I decided to use roll cork and cut my roadbed by hand. I wound up buying rolls of cork at Hobby Lobby. A 12” x 24” x 3/32” roll cost me $4.99 US, and that would handle a lot of Z track. (The SKU for that is 520064.)
I then needed to draw out where the track would go. I’ve seen a nice radius ruler, but I decided to make my own. While at Hobby Lobby I purchased an inexpensive clear ruler, and using my wire bits and a pin vice, I drilled center holes at 0”, 10.75”, and 11.5”. I also drilled holes that extend to the edge of the roadbed, at 10 7/16” and 12 1/8”. Those I kind of eyeballed. If the roadbed is a bit wide, I can trim. I don’t want it too narrow. But either way it’ll be covered with ballast, so absolute perfection isn’t required.
On the table I pinned the end of the ruler then drew the outline of the curve as well as (notional) track centerlines using the holes I drilled. I say “notional” because my lines didn’t quite square up. I think the cork shifted a little or my holes weren’t centered in the ruler. But since the width of the roadbed is consistent, I’m not concerned about the centerlines I drew initially. I’ll square those up when I lay down some track.
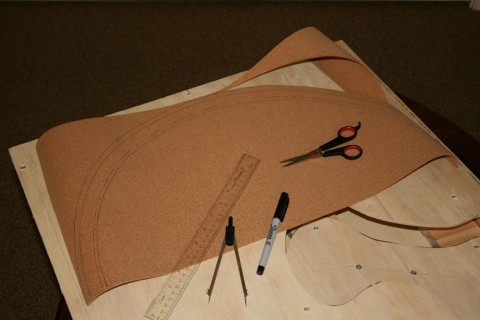
Once the pattern was drawn, I got out my scissors and cut!
Here is the fully-cut section:
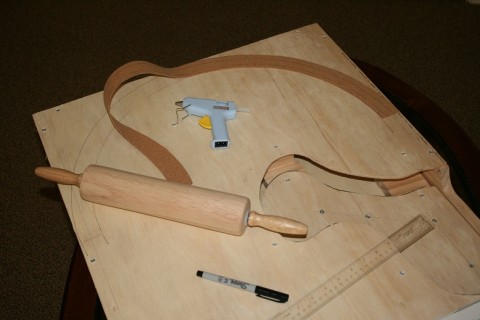
I then drew an outline on the table using the same pinned ruler approach. This gives me an idea where to apply hot glue. I fired up my glue gun and began securing the roadbed.
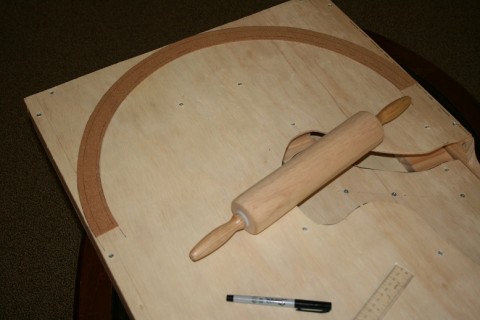
Here, I work with no more than about 6” to 8” of roadbed, so the glue doesn’t cool while I’m working. I apply some glue to the table and lay the cork over the glue. I then roll the roadbed with an inexpensive rolling pin I picked up at the grocery store. (My wife would kill me if I used hers, as it belonged to her grandmother.) I wanted to roll the cork as smooth as possible, but any small hills and valleys I’ll take care of when I sand the roadbed once it’s all completed. The track will cover a lot of imperfections as well. I’m really only concerned about any major hills and dales. However, here, in this case, I had none, so a light sanding and we’re gluing track.
While I had the unglued cork, I used it as a template and drew the outline on a separate piece of paper. Actually two such templates. I did this because I’m going to fabricate a curved turnout as well as a curved crossover, and I wanted to precisely match the curvature of the rails I expect to meet these fixtures. So I’ll save those and start on them once I have some tie material in. (I’ll need to custom-cut some tie material for the crossover.)
Eventually, working slowly around the curve, the cork is in place.
I’ll continue to cork the remainder of the layout in this manner. I have a small yard, and for that I’ll cork underneath all of the tracks in the yard. I’ll post some pictures once it’s done.

